
How to Use Layouts
Columns
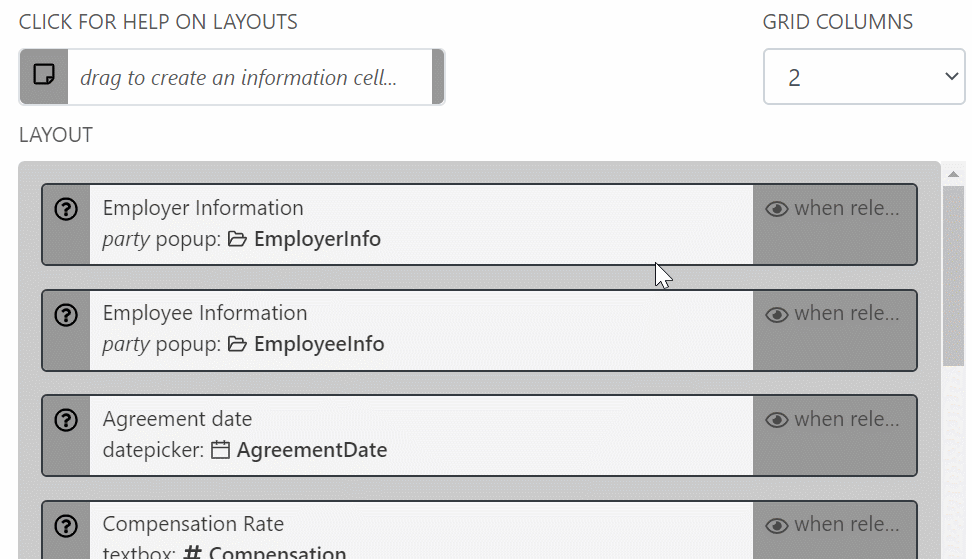
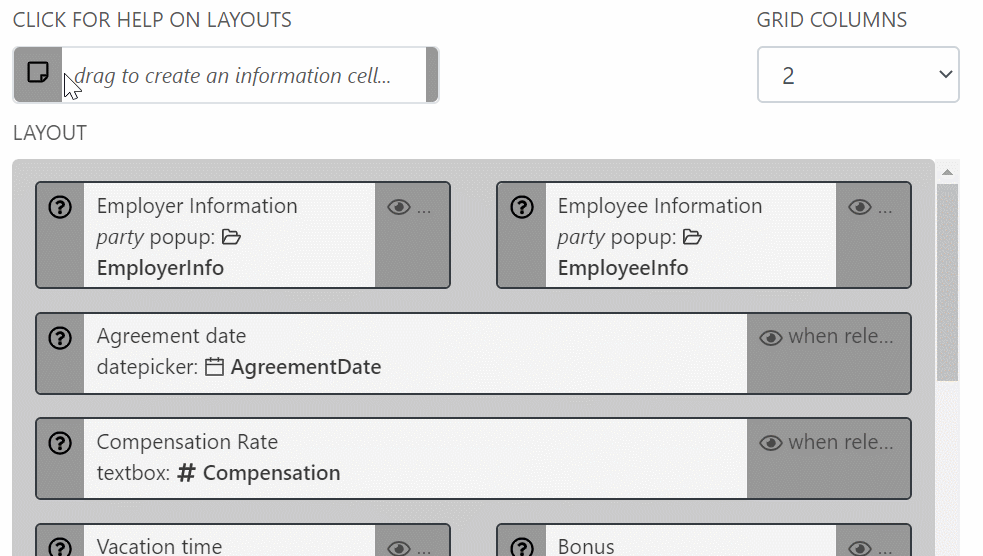
You can change layouts for Catalogs and Models. To do this, select the Model you want to change the layout on. Go to the Layouts. The default layout is one column with all the variables spanning the entire width of the column. To change the number of columns in each row, click the dropdown menu below Grid Columns. You can create up to six columns.

Arrange Variables with Click and Drag
To move variables around, click and drag the variable boxes to where you want them. Other variables will automatically move, so you can arrange them how you want.
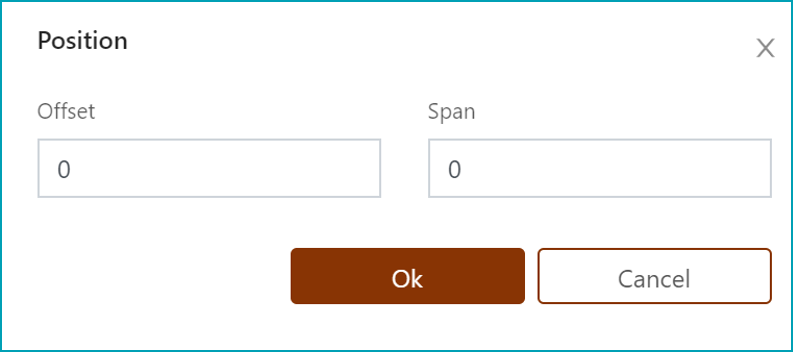
Give Variables Different Spans and Offsets
If you want a variable to span across multiple columns, click on the Layout Menu and click Position. You will have the options to input the Offset and the Span. The Offset is the column that the variable will start in, with 0 being the first column (1 the second, 2 the third, etc.). The Span is how many columns the variable will go across; a 0 makes the variable span across all the columns, 1 makes the variable span across one column, 2 makes the variable span across two columns, etc.
If you input spans and offsets, those variables will not automatically shift over if you click and drag another variable to be in its spanned and offset areas.

Creating an Informational Cell
Informational cells are boxes you can put text into if you want to include additional information or instruction on the form. This is different than Help Text because it is automatically on the App Intake, so users don’t need to click on anything to see it.
At the top of the Layouts designer, there is a box that says, “drag to create an information cell….” To the left of it, there is a note icon. Click and drag that icon into the area with the variables. Release when you have it where you want it. It will automatically span all the columns. You can change this by changing its span and offset. Clicking in the white box, you can add text.
Save
As always, do not forget to save changes.